![[VIDEO] The perfect square - how to build square nails correctly? STEP BY STEP](https://www.indigo-nails.com/media/magefan_blog/2020/06/video_idealny_kwadrat_–_jak_poprawnie_zbudowac_paznokcie_w_ksztalcie_kwadratu__krok_po_kroku.jpg)
Do you want to know how to perform salon square nails correctly? In the latest episode on our YouTube channel, you'll find a large dose of expert knowledge and learn how to create nails in the shape of a soft square. In addition, Paulina Walaszczyk will show you how to place the form properly and how to remove cuticles without cutting them.
In the beginning, it is worth noting that there are many different versions of square-shaped nails in the world. Starting from the master ones, long and short, i.e. just behind the tip. Those that have sharp edges and the ones slightly rounded. Each nail stylist has their own way to square nails. It's also important to know what final result the customer would like to see. If the square shape that we present in the video will be different from what you have seen so far, keep in mind that both are probably OK. Let's remember one thing! Each nail styling that is safe to create, safe to wear and liked by customers is correct.
Products used in the video:

Out of stock

Out of stock
Nail plate PREP - how to remove cuticles without cutting them?
- We sanitize our hands.
- We remove the cuticle pusher from the sterile package and push the cuticles back.
- We open the 100/180 and 180/220 file. With the 180 grit, we shorten and round the free edge.
- We reach for the bit no.9 and place it in the handle.
- With the handle perpendicular to the nail folds and flat to the nail plate, we clean it off the dead skin. The movements are gentle, without giving pressure. We work with small circles that not only clean the surfaces but also push the cuticles back. We dust it off.
- To speed up the work, we'll use a mandrel with a 240 grit. Slide the mandrel on and set the e-file to about 6-7 thousand revolutions. Without pressing it, we move on the nail plate in both directions - from right to left, and back, keeping the mandrel on the surface of the nail. And from top to bottom. And around the nail fold, cleaning the skin and all corners around the nail folds.
- With a 180-grit buffer, gently push the cuticles driving them up with the edge. Then, without any pressure, we'll clean the nail folds, rubbing the cuticles with the buffer (from top to bottom) with its straight edge.
- We flip the buffer, and with 220 grit, gently lift and smooth the cuticles, removing burrs and dead skin. We remove excess nail dust and any residues with a Flower Brush.
NOTE! We do it gently because we do not want to cut the customer in further stages of styling while filing.
- Pour the purple cleaner onto the dust-free cotton swab and dehydrate the nail plate very carefully, paying special attention to the area around the nail fold
- We apply the acid-free primer.
- We reach for the Protein Base. We apply a base layer; in other words, massage it into a nail plate and smooth it with a brush. Cure it for 30 seconds.
Nail extension - how to place the form correctly?
When placing the form, we will pay attention to 4 elements.
(1) the form angle
(2) fitting to the free edge
(3) form closure
(4) symmetrical position
- We peel off the form, tear the top joint. It's time to place the form. We place the form gently and let go. We need to check how it looks from the side. What we should pay special attention to is the line which creates an angle with a natural plate. In a square nail, this line should run along with the finger if the nail grows straight or should be slightly raised if the nail's surface is uneven or rises downwards. This is the basic rule for square nails. What if we don't follow it? If the form does not run straight and fall too much down, it's possible that we'll end up with this - a curved hawk nail. If the form is too high, the nail will also go up too much.
- The form should be fitted perfectly to the free edge. If we notice any gap, we remove the form and cut it to the desired shape. We grab the form, open it, place it under the nail, adjust it to the free edge and let go.
- We glue the form. We press the upper wings to the finger, and now we can close the other two at the bottom. Thanks to this, the form is not squeezed at the tip - and yet it can’t be, because with the square shape the form must remain open. If the form will be glued too much or crooked, the tunnel will be deformed. If the form is not properly glued or comes unstuck, then we'll end up with no tunnel at all.
- When the form is correctly placed, we need to look at it from the top and make sure it runs along with the finger. If the form turns in one direction, then the extended nail will do the same.
PRO TIP: Sometimes convex tips that are sticking out too much or the size of the nail e.g. the thumb, are blocking from fitting the form correctly. The solution might be small cuts in the form – Paulina calls them ‘batman’s cuts’ – that will help to fit the form to the shape of the nails.
Square nail extensions
- We use Easy Shape Light Rose gel. We take the product, we apply it with pulsing movement on the free edge, forming a frame. We reach the side edge with the brush's edge. We lead the edge of the extended nail straight. We level the surface with the edge of the brush. We put our hand to the lamp for 30 seconds.
- We remove the form. Gently, just at the free edge, squeeze the form, moving it left and right. We peel off the upper wings and pull the form down.
- We take a little gel and spread it thinly on the whole surface of the nail, reaching exactly to the cuticle area.
- We add a bit more of the product and start pulsating Light Rose on the surface. We start from the upper part of the nail - from the cuticle area. And we brush the product down, leading it from right to left and from left to right until we run out of the product. Then we add the gel and continue the pulsating zigzag.
- After applying the product, the surface may not be even. We shouldn't worry about it, just place the brush vertically, and stick it gently into the gel surface, moving up and down. This way, we spread the surface until we get a smooth structure.
- We put the hand into the lamp, and when we start feeling the heat - we quickly reach out to tighten the tunnel. We use tweezers and clamp the stress area and the entire free edge - take a look, the tweezers are at an angle. We have to be careful not to squeeze it too much because we can squeeze the tunnel or bend it. Because the pressure was balanced, the tunnel is well fitted to the natural nail - neither too curved nor too flat.
Note! important message: pinching should not hurt! If you think that only painful nail pinching will have a good effect and will slim the nail, you must know, that something is wrong.
- We check the shape of our nail. If we think it is too flat, we add a thin layer all over and select the next portion of the product, to create an apex. We put our hand to the lamp for 30 seconds.
How to file square-shaped nails?
- We wipe off the dispersion layer with a dust-free cotton swab soaked in a wipe off, and we move to the filing.
- First, we will file the shape seen from the front, so the sidewalls and free edge. We place the file straight and make a move as if we were cutting bread. We do not lean the file back - because then we will file the edges, and we do not want to do it yet. Only now are we ready to move to the free edge. If we want the square to have sharp edges, we place the file at an angle of 90 degrees. However, when doing salon nail looks, we slightly file in such a way as to get softer edges.
- We file the side edges. Holding the file along with the finger, we make gentle movements. We do not tilt the file. We only guide it perfectly straight along with the finger. if we swing the file, then the final look of our square edges will result in them being rounded. And we want it to be straight. It’s supposed to be soft but straight. If the file is held down, the edge will also go down, and if we keep the file up, the edges will go up too.
- We reach for a mandrel with a 180 grit. We fit it on and set the e-file at about 8-9 speed, we reach a maximum of 10 thousand revolutions, depending on the power of the e-file. If the e-file is set at too high revolutions, the mandrel may slide off the nail surface. Placing the mandrel parallel to the nail plate, we run it from right to left, and back again, floating on the central part of the nail, and moving lower to the sides. We run the e-file handle in the 'U' shape.
- When the surface is levelled, we move to the tunnel, and we file it to get a perfect, thin hair line.
- We control the nail profile and create an upper arch, meaning, an elongated outer arch that begins at the cuticles, passes through the entire apex and ends at the hairline. We file it, remembering that the mandrel should not be laid flat, and the apex was created in the right place.
There are different schools of how to create the perfect apex, but some elements don't differ:
- Apex can’t be moved to the stress area, because it overloads the entire structure, and the nail is exposed to breaking and air pockets. With ordinary, everyday activities, it can act as a lever down and break an extended nail, devastating the natural nail and causing a very unpleasant feeling.
- Apex can't be too flat, as it can go upwards. Too small amount of product won't create a strong nail construction, and this means potential breakage of the extended nail, damage to the natural nail plate and pain.
Only a properly built apex can save us from these kinds of surprises.
- We go back to the tunnel, and we tip the nail to check the convex, called the transverse arch.
- When we finally have the desired shape, we change the mandrel to 240, which we'll use at the cuticles area and smooth the surface. Driving up the cuticles, we hold the mandrel at an angle of 45 degrees and work around the nail fold. We level the unevenness and smooth.
- We remove excess nail dust with Flower Brush, and we move to a 220 grit buffer, which we use to get rid of mini burrs on the skin and give nails the final touch.
- We switch to the 180 buffer and this time with a slightly swinging motion, round the nail edges, like a cradle. We don't want to change their shape, just want them not to hook when worn.
- Soak a cotton pad with a wipe off and wipe the surface.
- We apply Wet Look to give shine, and cure for 30 seconds.
- After curing, wait about 1 minute, and only then wipe off the dispersion layer with a Supershine Cleaner.
NOTE! "top coat that doesn't shine" - this is often a dispersion layer, just improperly wiped off, or transferred dispersion from one finger to another. A dispersion rubbed into the cuticles can cause skin irritation - no matter what products you use. Therefore, we always wipe the dispersion down and replace the swab every 2 to 3 fingers.
- We polish the nails with a dry cotton swab until we hear the characteristic creaking sound – it’s a sign we have removed the dispersion layer.
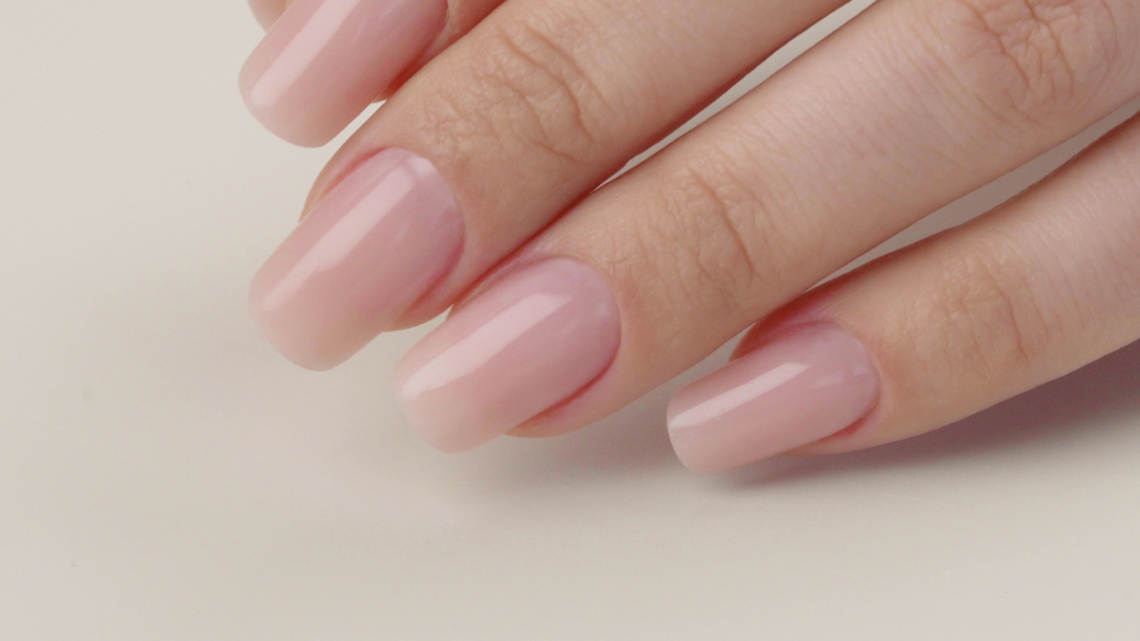
- And Voila! - a soft, salon square is ready!
If you want to know how to prepare almond-shaped nails step by step, go HERE.
Published:
25.06.2020
Updated:
07.11.2023