![[VIDEO] Neon gel polish nails - how to make them look perfect? Ruffian Manicure STEP BY STEP](https://www.indigo-nails.com/media/magefan_blog/2020/06/video_neonowe_paznokcie_hybrydowe_–_jak_zrobic_by_wygladaly_idealnie__ruffian_manicure_krok_po_kroku.jpg)
Discover the new Fluomania Collection, let's find out what base to choose to highlight what's best in neon, and discover a clever way to infill with a neon rainbow. All this is waiting for you in the latest episode on our Indigo YouTube channel.
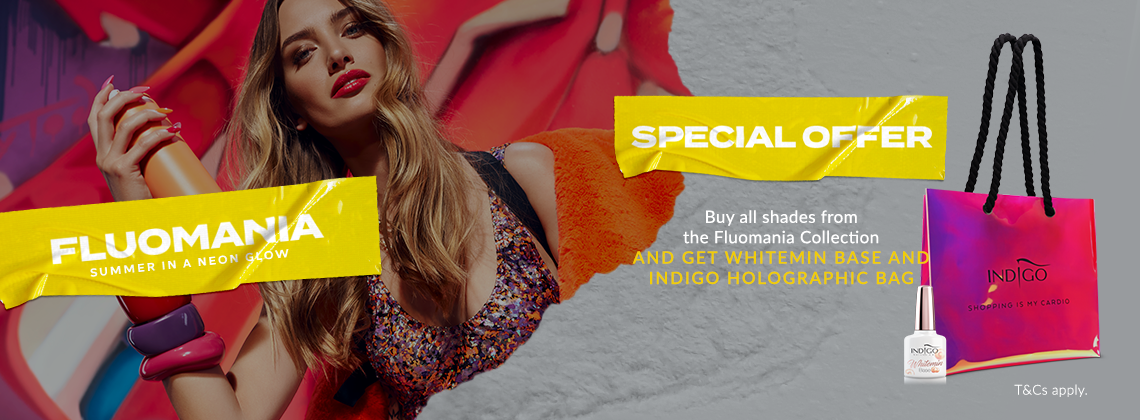
The best gel polish base for neon nail looks
You've probably already heard that the white base, as a foundation for neons, brings out their superpower. It's true. That's why our Whitemin Base is the perfect solution. One neon layer applied on the Whitemin built-up nail has greater saturation than two layers of neon coats applied on a transparent base. It's a smart way not only to boost the neon effect but also to optimize your work. Instead of applying a transparent base, white gel polish and neon or two layers of neon, you build-up the nail with the Whitemin Base and apply one coat of neon. It saves about 5-10 minutes of time - and the product. Conclusion? If you use neons, it doesn't pay off not to use Whitemin Base.
If you want to see how phenomenal the effects of a combination of Whitemin and neon shades are, we have good news for you. Now, when you buy all Fluomania shades, you can get Whitemin Base and a pink holo bag within the price of the collection. The offer is valid until 15.07.2020. or while stocks last.
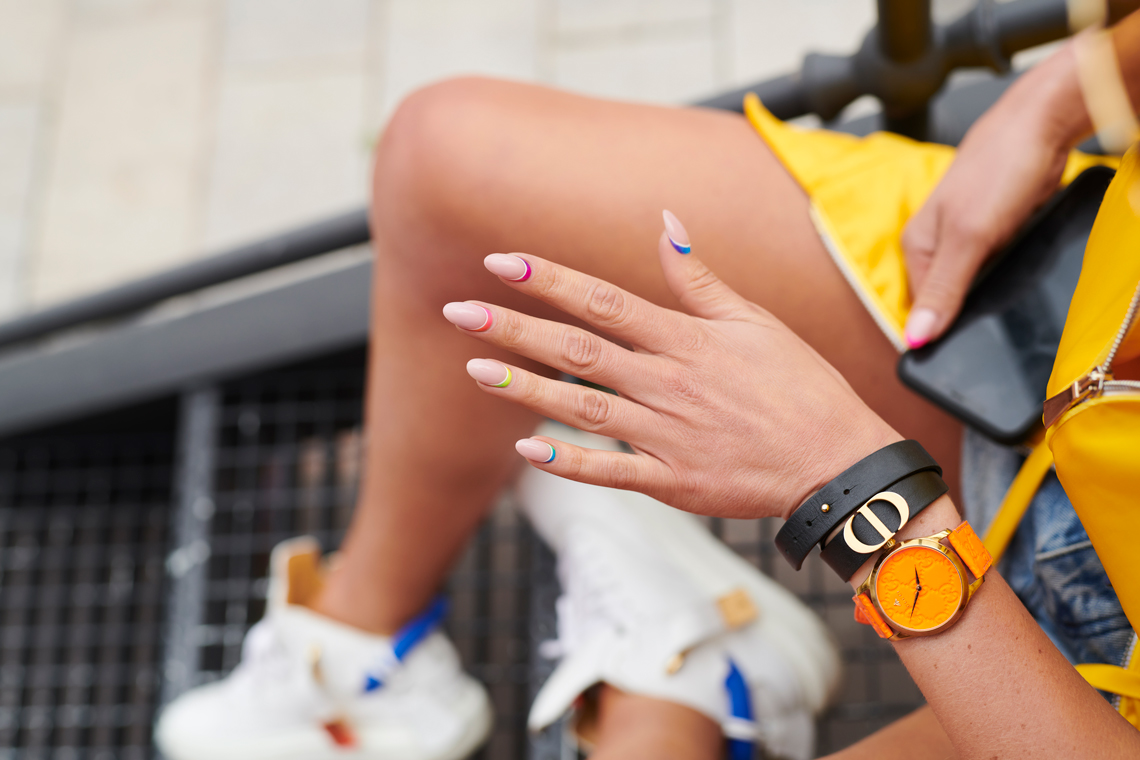
Neon rainbow on nails
A Ruffian Manicure - the so-called reverse moons - is a smart way to do the design while doing infill. In the latest episode on the YouTube channel Indigo Nails POLSKA, Paulina Walaszczyk - multiple medallist of nail styling competitions - presents how to do infill with a rainbow in the Fluomania Collection shades.
Product we’ve used in the video:
- Fluomania Collection gel polishes
- Mr. White gel polish
- Whitemin Base
- Liquid Base
- Wet Look top coat
- Arte Brillante White gel
- 220/280 buffer
- 180 grit file
- Cleaner
- Acid-free primer
- Bit no.9
- Master Nail Art. 004
- Master Nail Art 007

Out of stock

Out of stock

Out of stock

Out of stock

Out of stock
Ruffian Manicure - how to perform moon manicure while doing infill?
If the customer comes to the nail salon with regrowth, first the nails should be filed and buffered with 180 grit file. The cuticles should be pushed back and treated with a properly selected nail bit. The skin and natural nail plate should be gently smoothed with a 180/220 grit buffer and the surface of the nails dehydrated with purple cleaner.
- We apply Acid-free Primer to the regrowth area - on the natural nail plate with a nail polish movement. We do not drag the product onto the built part of the nail. The final effect we want to achieve is the colour in the place of regrowth.
- Massage Liquid Base into regrowth and regrowth product. The base we apply on regrowth should be very thin to allow the creation of the thinnest layer possible. Liquid Base will work great here. Cure for 30 seconds in the lamp.
- We remove the sticky layer with a clean, dry cotton swab so that the design we create won't slide on the surface.
- We place a drop of Mr.White on the slide and with brush 004 apply the colour in place of regrowth, creating white half-moons. Each nail is cured individually to avoid the risk of the cuticles flooding. When applying the colour in the cuticles area, we do not add more product but drag it with the tip of the bristles.
- Cure the whole hand in the lamp for 30 seconds.
- We prepare the colours for our rainbow on the slide.
Small finger: Very Different, Neonidas, Fluomaniac.
Ring finger: Fluomaniac, Neonek and Ave Neon
Middle finger: Ave Neon, Lovelas, La Bamba.
Index finger: La Bamba, Mad Woman, Very Different.
The thumb: Very Different, Neonidas, Fluomaniac - just like on the little finger.
- We push the cuticles back with the cuticle pusher and apply 3 colours, remembering about cleaning the brush every single time. We mix the colour borders to achieve a smooth transition. When mixing colours, we run the brush freely - we can do circles, waves, eights. We do each finger individually and cure it for 15 seconds in the lamp.
- When all 4 nails are ready, we cure the whole hand for 30 seconds and move to the thumb.
- We secure the design with Wet Look top coat. First, apply the top coat smoothly on the whole surface, and then push the product with a brush to the point where the coloured regrowth joins the rest of the nail plate. To level the surface, we can add a tiny drop and spread it gently with the edge of the brush. This way, we smooth the surface and create a line of light.
- We cure each nail individually, to keep the light line in place. If needed, we turn the hand upside down - this way the gravity will help us to smooth the surface.
- After curing all nails, wait 30 seconds, and wipe the dispersion layer (sticky layer) with a dust-free cotton swab dipped in Wipe Off. We use a few cotton pads to not spread the dispersion from one nail to another.
- We use a dry swab to polish the surface, making sure that we have removed the sticky layer.
- Time for a final touch to our nail art look - white lines, made with Arte Brillante gel. The 007 brush, hold at an angle of 45 degrees. Do not try to make the whole line at once - it's better to divide it into 2 or 3 parts. We make sure to drain the product regularly - if we apply too much, we will not maintain control over the precise line.
- We cure each finger individually for 30 seconds, and it's ready!
Published:
18.06.2020
Updated:
07.11.2023