![[VIDEO] Air pockets on gel polish or gel nails - how to avoid it? The most common mistakes!](https://www.indigo-nails.com/media/magefan_blog/2020/05/video_zapowietrzenie_paznokci_zelowych_lub_hybrydy_–_jak_go_uniknac__najczestsze_bledy.jpg)
How are air pockets born? How to avoid it? See the latest episode on our YT channel. Find out the most common reasons for lifting and learn how to avoid them.
Product lifting and air pockets are topics that irritate both nail stylists and customers, as well as professional nail product manufacturers. We would like to get rid of the topic once and for all, so our lives will be much easier. To do that, however, you must have some experience. The better we know the product, the better we know the technique, the less chance of the product lifting. In the latest episode on the Indigo Nails POLSKA YouTube channel, our long-time educator and multiple nail styling medalist, Klaudia Kawińska, explains the reasons for product lifting and gives tips on how to avoid the most common mistakes.
We have used:

- Incorrect nail plate prep - dead tissue being improperly removed.
By applying any product to the nail plate with living tissue, you can be sure the styling will end up with product lifting. Before application of any nail styling product, remember to clean the cuticles and the nail plate properly.
- To prep the nail plate, we are going to use bit No. 9.
- We push the cuticles back and remove the living tissue, cuticles stuck to the nail plate.
- To remove all dead and living tissue from the nail plate, we should push the cuticles with the bit up and sweep them sideways. This way, we can reach not only the dead tissue that we can see but also those hidden under the cuticles.
- We work millimetre by millimetre and do not jump with a bit. We are careful not to miss any areas.
- If the cuticle is attached to the nail plate, it means that there is still a nail fold in this area. If we apply the product in this area, then air bubbles are guaranteed. The cuticle must be separated from the nail plate. Then we can be sure that the product will stick to the nail and we won't end up with air pockets
- We should remove cuticles only after filing and buffing. This way, we minimize the risk of cutting.
- Incorrect surface buffing
- We may think it's not rocket science, but improper buffing is one of the common reasons for product lifting.
- For the product to have more adhesion, we use a buffer to get rid of the top layer of the previous styling.
- Not only is the way we are buffing the nail
isimportant but also with what. We have 3 types of buffers to choose from 100/180, 180/220 and 220/280. We must remember that the last one is only suitable if we are about to apply traditional nail polish. When applying a gel polish or gel, we reach for lower grids. - The buffer grid choice depends on the customer's nails. For one customer, 100 grid is ok, for the other one you may need 220. If you matt the surface of the nail correctly and the customer comes back with air pockets anyway, you should choose a lower grid buffer. Please remember that we are still talking about the buffers, we do not use files for natural nail plate matting, buffers only.
- We give the shape to the nail. Make sure that there are no burrs under the nails.
- We dust the surface off. We know that we'll no longer use a file or buffer, so we remove the cuticles.
- Wrong Cleaner
Indigo offers 3 Cleaners, and each does something different.
- Purple is used to dehydrate the natural nail plate, on which we are going to apply a primer, base and subsequent layers of the nail style.
- Wipe Off - is used to wipe a cured surface - e.g. before filing or decorating.
- Supershine is used for dehydration and glossing the finished layer and nourishing the cuticles.
- A common mistake is to use Wipe Off interchangeably with purple Cleaner. These products, however, work completely differently. After wiping the surface with a purple cleaner, the nail plate becomes as if matt. The purple Cleaner contains acetates that dissolve fast and draws water from the surface of the nail plate. On this type of prepared nail plate, we can create a long-lasting style.
- Wipe Off, unlike the purple one, does not leave such characteristic white patches. Wipe Off dehydrates but does not remove moisture from the nail surface.
- Purple Cleaner is not the cheapest one - precisely because of its reliability in the nail prep before styling. To minimise its use, we can dehydrate the nail plate with Wipe Off, and before applying the Primer, we can apply the Cleaner with a brush. It's also available in small bottles.
- The wrong primer
We offer 2 different primers. How do they differ?
- Acid-free is more delicate. It's designed to create a double-sided tape to which the product will stick - in our case, Protein Base. Before applying, we drain the brush so as not to apply too much of the product. We apply the primer like nail polish, over the entire length of the nail plate or in the case of infill - only on the growth. We do not wait for the product to evaporate. The acid-free primer leaves a sticky, shiny layer.
- The acid primer is more aggressive. It works like sandpaper, leaving microscopic nooks in the nail surface. It creates physicochemical adhesion between the built-up nail coating and the natural nail plate.
Please note that the main ingredient of Acid Primer, methacrylic acid, is a substance that affects the epidermis. That's why we apply the primer in a minimal amount, in spots, trying not to touch the cuticles. We wait until it evaporates completely - about half a minute.
Hand sweating or hormonal problems are usually a sign to use Acid Primer.
- Flooded cuticles
If we apply any product too close to the cuticles when applying curable light products, we can be sure that after a week we will end up with air pockets. And this is not just a matter of aesthetics and durability of styling - air pockets are an ideal place for the development of green bacteria. Take our word, it's better to apply the product 1mm lower than cover the cuticles.
- When applying Protein Base, first, we brush the whole nail and cure it.
Only with the next layer we can add more Protein to build up or extend the nail. We never apply thick layers of the product - we work in layers, thanks to which the cured Protein will stick much better to the natural plate.
- During the summer months, most gel products become thinner due to the high temperature. It's worth to take the utmost care.
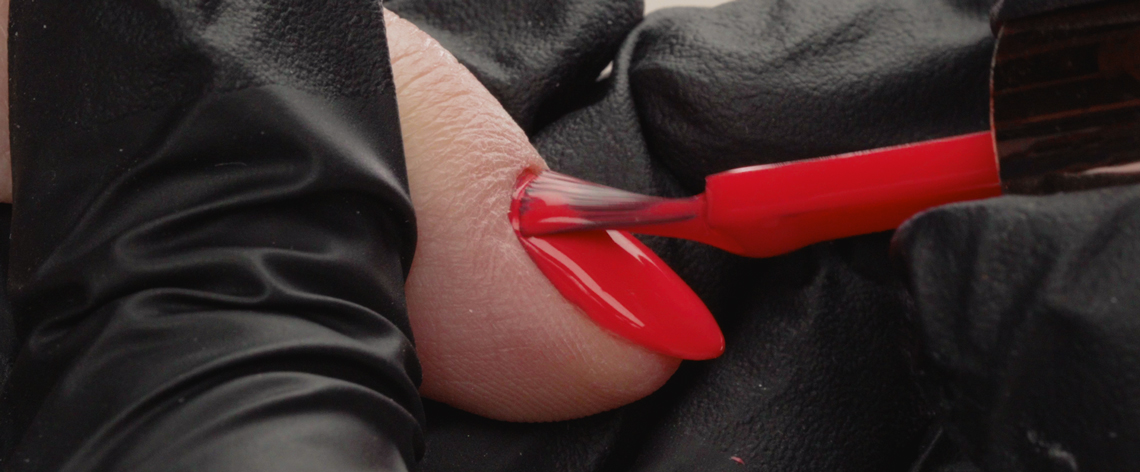
- We apply the colour on ¾ of the nail, brush it over the entire length and gently push with a brush. If we have touched the cuticles, we must clean it with a pusher or wooden stick. However, if you flooded the cuticles too much or we use dark gel polish, we must wipe the entire nail with Wipe-Off or purple Cleaner and apply it one more time.
- One of the ways for the perfect finish is applying the product in the cuticle area only with the 2nd layer of colour. The amount of product in the cuticle area that we need to achieve full coverage is minimal. It is better to apply less than too much.
- When applying Tip Top, there must be less product on the brush than when applying the base or colour. Tip Top is thinner than Protein and will dissolve faster on the nail plate.
- Leaving air bubbles when doing infill.
In the case of infill, the first step is to level the nail plate and the product. We must remove existing air bubbles. If we apply the product on even a tiny air bubble, it will get bigger and will create the perfect environment for the development of microorganisms.
- We use a 180 grid file. We give the desired shape, not forgetting the bottom of the nails.
- When we removed the product with a file, we smooth the nails with a 180/220 buffer and move to remove the cuticles - exactly as in the first point.
- Infill and nails that should be taken off and applied on a full set.
When doing infill, our task is to remove some part of the old nails, and we must decide for ourselves which part of the product to remove and which can stay.
- We need to remember to asses what's the condition of the applied product. If it has changed its structure from hard to gummy, it's a sign that the product is old and should be removed to zero and applied again. Exactly the same situation occurs if our product begins to change its colour from transparent to slightly milky. We should remember that the product on the free edge is already about 10-12 weeks old and can change its original properties.
- If you do the infill that is not suitable to wear, we will end up with air bubbles. This time not at the cuticles, but from the free edge.
- Tunnel and wavy nails.
These types of nails require more frequent product change.
- In the case of tunnel nails, the corners of the free edge curl more, and in this place, the product can peel off, creating air bubbles. With such nails, remember, a more frequent product change might be required. Remember to control it at every customer's visit. If you notice that the natural nail from the bottom begins to curl too much and peel off; file it with a bit No. This way, you'll avoid air pockets and product lifting.
In the case of wavy nails, when regrowth goes to the area of stress and where the air pockets can appear, it's best for the customer to wear shorter nails. First of all - due to aesthetic reasons and secondly - due to air bubbles and product lifting. No gel polish product can sustain such overload in the stress area. If the customer dreams of longer nails, and her natural nail plate grows down, it's best to cut the nails and extend it with a stronger product than a gel polish - like gel or acrylic.
Published:
14.05.2020
Updated:
07.11.2023