

![Gel Nails - step by step [VLOG]](https://www.indigo-nails.com/media/magefan_blog/2020/09/paznokcie-zelowe-krok-po-kroku-vlog.jpg)
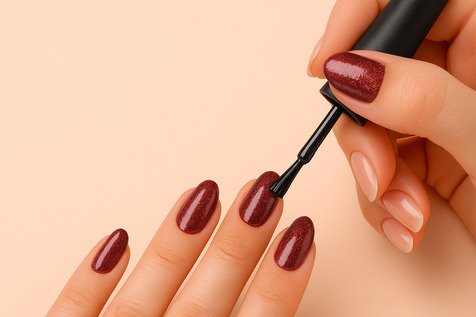
Gel nails have revolutionised the manicure and the work of nail artists. The ability to create a durable, beautiful and damage-resistant manicure has become a salvation for millions of women! Since it’s possible to make gel nails, and their durability is several times greater than in the case of a traditional manicure, the popularity of this method has been growing exponentially!
Thanks to our short guide you’ll learn how to make gel nails. Read more!
Gel nails on a natural nail plate – step by step
- Degrease the previously prepared nail plate with Cleaner
- Apply a thin layer of Acid Free Primer.
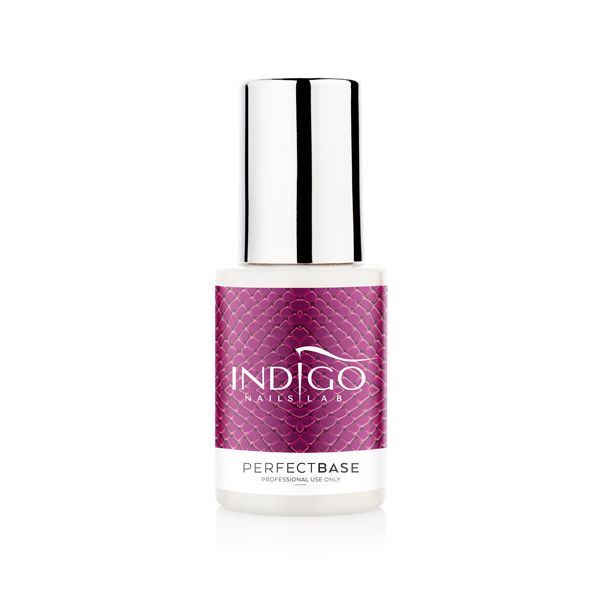
- Apply / rub in Perfect Base and cure in a LED lamp for 30 seconds.
- Apply Easy Shape Rosy gel to the nail covered with the base using a gel brush to create a frame. Then, create a C curve. Cure it in the LED lamp for 30 seconds.
- Remove the dispersion layer with Wipe Off Cleaner.
- File the cured nail and give it the desired shape.
- Use a 100/180 buffer.
- Degrease with Cleaner.
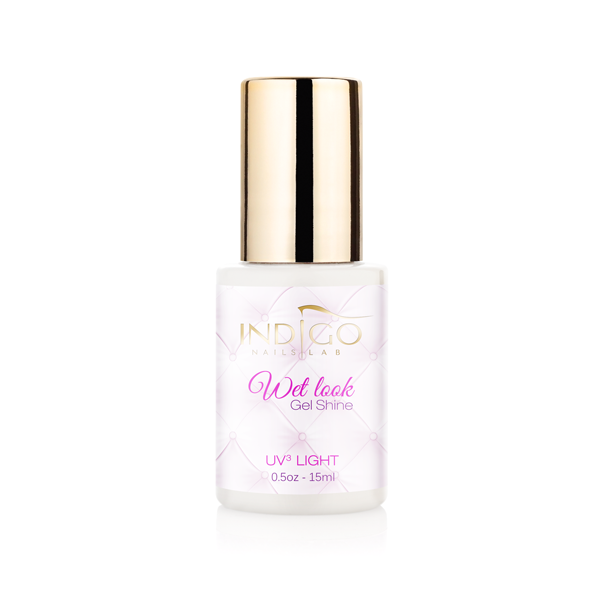
- Cover the nail design with Wet Look top.
- Degrease the nails with Super Shine Effect Cleaner.
A gel manicure is a basic service in an arsenal of any nail stylist. It allows model nails to desirable length and shape and makes them look great for weeks. There are many kinds and ways to perform gel manicure. The most popular is a three phase method. It requires using base, building gel and a shining top.
Our instructor – Magdalena Żuk – will present a step by step tutorial on a perfect building and lengthening method with use of salon products.
Perfect Base – indispensable gel base which ensures a good adhesion and prevents forming air bubbles.
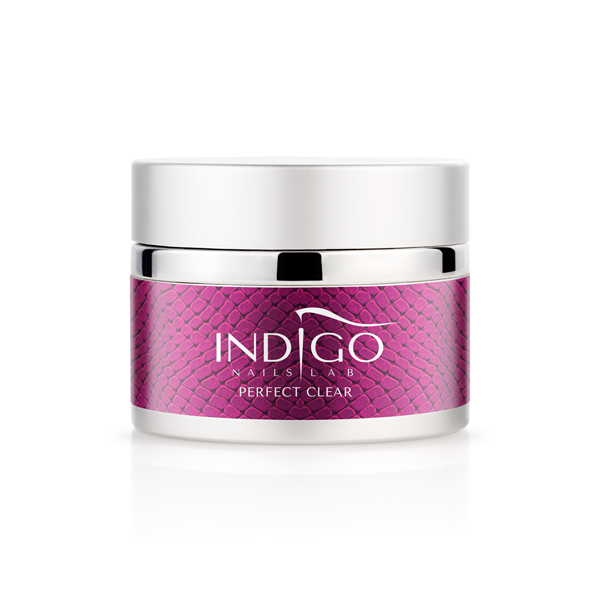
Perfect Clear – transparent builder gel with a semi thick consistency. It is elastic, easy to level and doesn't get into cuticle area. Working with it is easy and pleasurable.
Wet Look – high gloss gel, which will give manicure glossy finish. It makes nails resistant to scratches and looks great for many weeks.
See our step by step tutorial:
Published:
02.09.2016
Updated:
06.11.2023